How Cubesfortubes calibrates the CF-1 microphone
The often recommended standard for calibrating microphones is the substitution method. The test is performed like this: A reference microphone measures the source’s frequency response. Then the microphone under test is positioned in place of the reference microphone. For best results these measurements should be performed in an anechoic chamber. For low frequencies, however, this would require a very large room. A small pressure chamber is often a better choice. Both measurements are merged, and the resulting substraction curve gives us a calibration file that can be used with your audio sofware.
Usually, this accuracy is not required for DIY audio projects. We therefore decided to offer a reliable and less expensive calibration service. We compare the microphone under test with another CF-1 that was calibrated according to the description above using a Brüel & Kjær set (capsule type 4188, preamp type 2669L). Both microphones measure the frequency response in a small pressure chamber. We get a new correction curve by substraction. This text file can be loaded in the audio software. Notice that this calibration is only valid for the combination of the CF-1 and the AF-1 preamp.

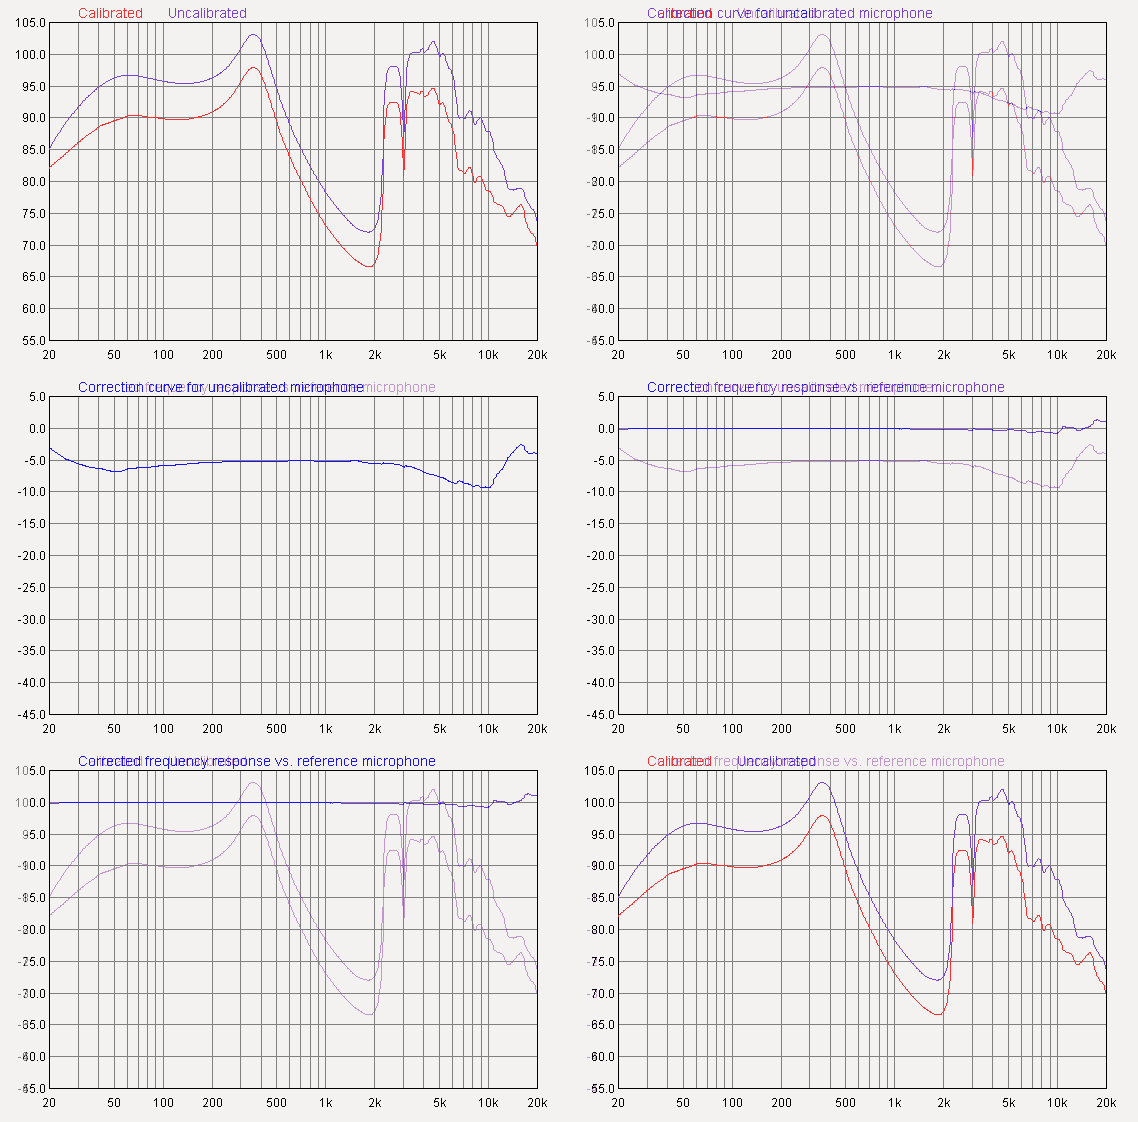
Graph 1 shows the reference microphone (red) versus the microphone under test (violet). The offset of the y-axis indicates a difference in sensitivity. In addition to that we can see a slight drop at high frequencies. Graph 2 shows the substraction of both curves. We can load this curve as a correction file. Graph 3 shows the resulting new substraction curve of the reference microphone and the now calibrated microphone under test. It’ nearly flat and indicates that both microhones measure the same in terms of frequency response and volume levels.

